Object Detection
Overview
In this tutorial, we will learn how to run inference with a PyTorch YOLOv8 model using the RBLN SDK C/C++ Runtime API.
The model is compiled using the RBLN SDK Python API, and the resulting *.rbln file is used for inference using the
RBLN SDK C/C++ Runtime API.
This approach combines the ease of model preparation in Python with the performance benefits of C/C++ for inference.
The entire code used in this tutorial can be found in RBLN Model Zoo.
Setup & Installation
Before you begin, ensure that your system environment is properly configured and that all required packages are installed. This includes:
- System Requirements:
- Packages Requirements:
- Installation Command:
| pip install torch ultralytics cmake
pip install \
--extra-index-url https://pypi.rbln.ai/simple \
rebel-compiler==0.11.0
|
Note
- Please note that
rebel-compiler requires an RBLN Portal account.
- The commands above are intended for a default pip install on Debian-based Linux such as Ubuntu. For all other configurations, refer to the Installation Guide for the supported install matrix and the applicable commands.
Compilation with RBLN Python API
While the RBLN Python API offers comprehensive functionality, capable of handling both compilation and inference processes within the RBLN SDK,
the RBLN SDK C/C++ Runtime API is specifically designed and optimized for inference operations only.
We will use the RBLN Python API for model compilation and RBLN SDK C/C++ Runtime API for performing inference.
Prepare the model
Import the YOLOv8m model from the ultralytics library and perform a forward pass to prepare the model.
| from ultralytics import YOLO
import rebel
import torch
model_name = "yolov8m"
yolo = YOLO(f"{model_name}.pt")
model = yolo.model.eval()
model(torch.zeros(1, 3, 640, 640))
|
Compile the model
Once a torch model (torch.nn.Module) is prepared, compile it with rebel.compile_from_torch().
Save the compiled model using compiled_model.save().
| # Compile the model
compiled_model = rebel.compile_from_torch(model, [ ("x", [1, 3, 640, 640], "float32") ])
# Save the compiled model to local storage
compiled_model.save(f"{model_name}.rbln")
|
Complete compilation
The compilation code is included in compile.py.
Execute the script as follows to generate the rbln file:
| $ python compile.py --model-name=yolov8m
|
Inference with RBLN SDK C/C++ Runtime API
Use the model for inference with the RBLN SDK C/C++ Runtime API to load the compiled model, run inference, and check output results.
Prepare CMake build script
The example application uses OpenCV for image pre/post-processing and argparse for CLI parameter parsing.
The CMake script below describes external package dependencies and linking.
| # Define dependencies for external Package
include(FetchContent)
include(cmake/opencv.cmake)
include(cmake/argparse.cmake)
# Define the name of executable
add_executable(object_detection main.cc)
# Update link info for package dependencies: OpenCV
find_package(OpenCV CONFIG REQUIRED)
target_link_libraries(object_detection ${OpenCV_LIBS})
# Update link info for dependencies: RBLN
find_package(rbln CONFIG REQUIRED)
target_link_libraries(object_detection rbln::rbln_runtime)
# Update including dependencies: argparse
target_include_directories(object_detection PRIVATE ${argparse_INCLUDE_DIRS})
|
Preprocess the input image using OpenCV APIs. The following code snippet reads and preprocesses the image.
| std::string input_path = "${SAMPLE_PATH}/people4.jpg";
cv::Mat image;
try {
image = cv::imread(input_path);
} catch (const cv::Exception &err) {
std::cerr << err.what() << std::endl;
std::exit(1);
}
cv::Mat blob = cv::dnn::blobFromImage(GetSquareImage(image, 640), 1./255., cv::Size(), cv::Scalar(), true, false, CV_32F);
|
Run inference (Synchronous Execution)
The following code snippet shows synchronous inference.
| std::string model_path = "${SAMPLE_PATH}/yolov8m.rbln";
RBLNModel *mod = rbln_create_model(model_path.c_str());
RBLNRuntime *rt = rbln_create_runtime(mod, "default", 0, 0);
// Set input data
rbln_set_input(rt, 0, blob.data);
// Run sync inference
rbln_run(rt);
// Get output results
void *data = rbln_get_output(rt, 0);
|
Run inference (Asynchronous Execution)
The following code snippet shows asynchronous inference.
| std::string model_path = "${SAMPLE_PATH}/yolov8m.rbln";
RBLNModel *mod = rbln_create_model(model_path.c_str());
RBLNRuntime *rt = rbln_create_async_runtime(mod, "default", 0, 0);
// Input Buffer Memory Mapping for Async execution
std::vector<void*> inputs = {blob.data};
// Output Buffer Memory Mapping for Async execution
auto n_out = rbln_get_num_outputs(rt);
std::vector<cv::Mat> outputs(n_out);
std::vector<char *> output_ptrs(n_out);
for (auto idx = 0; idx < n_out; idx++) {
const RBLNTensorLayout *layout = rbln_get_output_layout(rt, idx);
outputs[idx] = cv::Mat{layout->ndim, layout->shape, CV_32F};
output_ptrs[idx] = reinterpret_cast<char *>(outputs[idx].data);
}
// Run async inference
int rid = rbln_async_run(rt, inputs.data(), output_ptrs.data());
// Wait inference done
rbln_async_wait(rt, rid, 1000);
|
Post Processing
Process the output data (float32 array of shape (1,84,8400)) to perform NMS and draw bounding boxes.
The following code snippet outlines the processing steps:
| // Postprocessing for NMS
const RBLNTensorLayout *layout = rbln_get_output_layout(rt, 0);
cv::Mat logits{layout->ndim, layout->shape, CV_32F};
memcpy(logits.data, data, rbln_get_layout_nbytes(layout));
std::vector<cv::Rect> nms_boxes;
std::vector<float> nms_confidences;
std::vector<size_t> nms_class_ids;
for (size_t i = 0; i < layout->shape[2]; i++) {
auto cx = logits.at<float>(0, 0, i);
auto cy = logits.at<float>(0, 1, i);
auto w = logits.at<float>(0, 2, i);
auto h = logits.at<float>(0, 3, i);
auto x = cx - w / 2;
auto y = cy - h / 2;
cv::Rect rect{static_cast<int>(x), static_cast<int>(y), static_cast<int>(w), static_cast<int>(h)};
float confidence = std::numeric_limits<float>::min();
int cls_id;
for (size_t j = 4; j < layout->shape[1]; j++) {
if (confidence < logits.at<float>(0, j, i)) {
confidence = logits.at<float>(0, j, i);
cls_id = j - 4;
}
}
nms_boxes.push_back(rect);
nms_confidences.push_back(confidence);
nms_class_ids.push_back(cls_id);
}
std::vector<int> nms_indices;
cv::dnn::NMSBoxes(nms_boxes, nms_confidences, 0.25f, 0.45f, nms_indices);
cv::Mat output_img = image.clone();
for (size_t i = 0; i < nms_indices.size(); i++) {
auto idx = nms_indices[i];
auto class_id = nms_class_ids[idx];
auto scaled_box = ScaleBox(nms_boxes[idx], output_img.size(), 640);
cv::rectangle(output_img, scaled_box, cv::Scalar(255, 0, 0));
std::stringstream ss;
ss << COCO_CATEGORIES[class_id] << ": " << nms_confidences[idx];
cv::putText(output_img, ss.str(), scaled_box.tl() - cv::Point(0, 1), cv::FONT_HERSHEY_DUPLEX, 1, cv::Scalar(255, 0, 0));
}
cv::imwrite("result.jpg", output_img);
|
Release resources
Release the runtime and model.
| rbln_destroy_runtime(rt);
rbln_destroy_model(mod);
|
How to build using CMake
The code snippets are included in the RBLN Model Zoo C++ examples.
To compile the code and create the executable binary, run the following commands:
| $ mkdir ${SAMPLE_PATH}/build
$ cd ${SAMPLE_PATH}/build
$ cmake ..
$ make
|
How to run Executable file
After completing all steps, you can find the executable in the build directory.
| # Synchronous execution
$ ${SAMPLE_PATH}/build/object_detection -i ${SAMPLE_PATH}/people4.jpg -m ${SAMPLE_PATH}/yolov8m.rbln
# Asynchronous execution
$ ${SAMPLE_PATH}/build/object_detection_async -i ${SAMPLE_PATH}/people4.jpg -m ${SAMPLE_PATH}/yolov8m.rbln
|
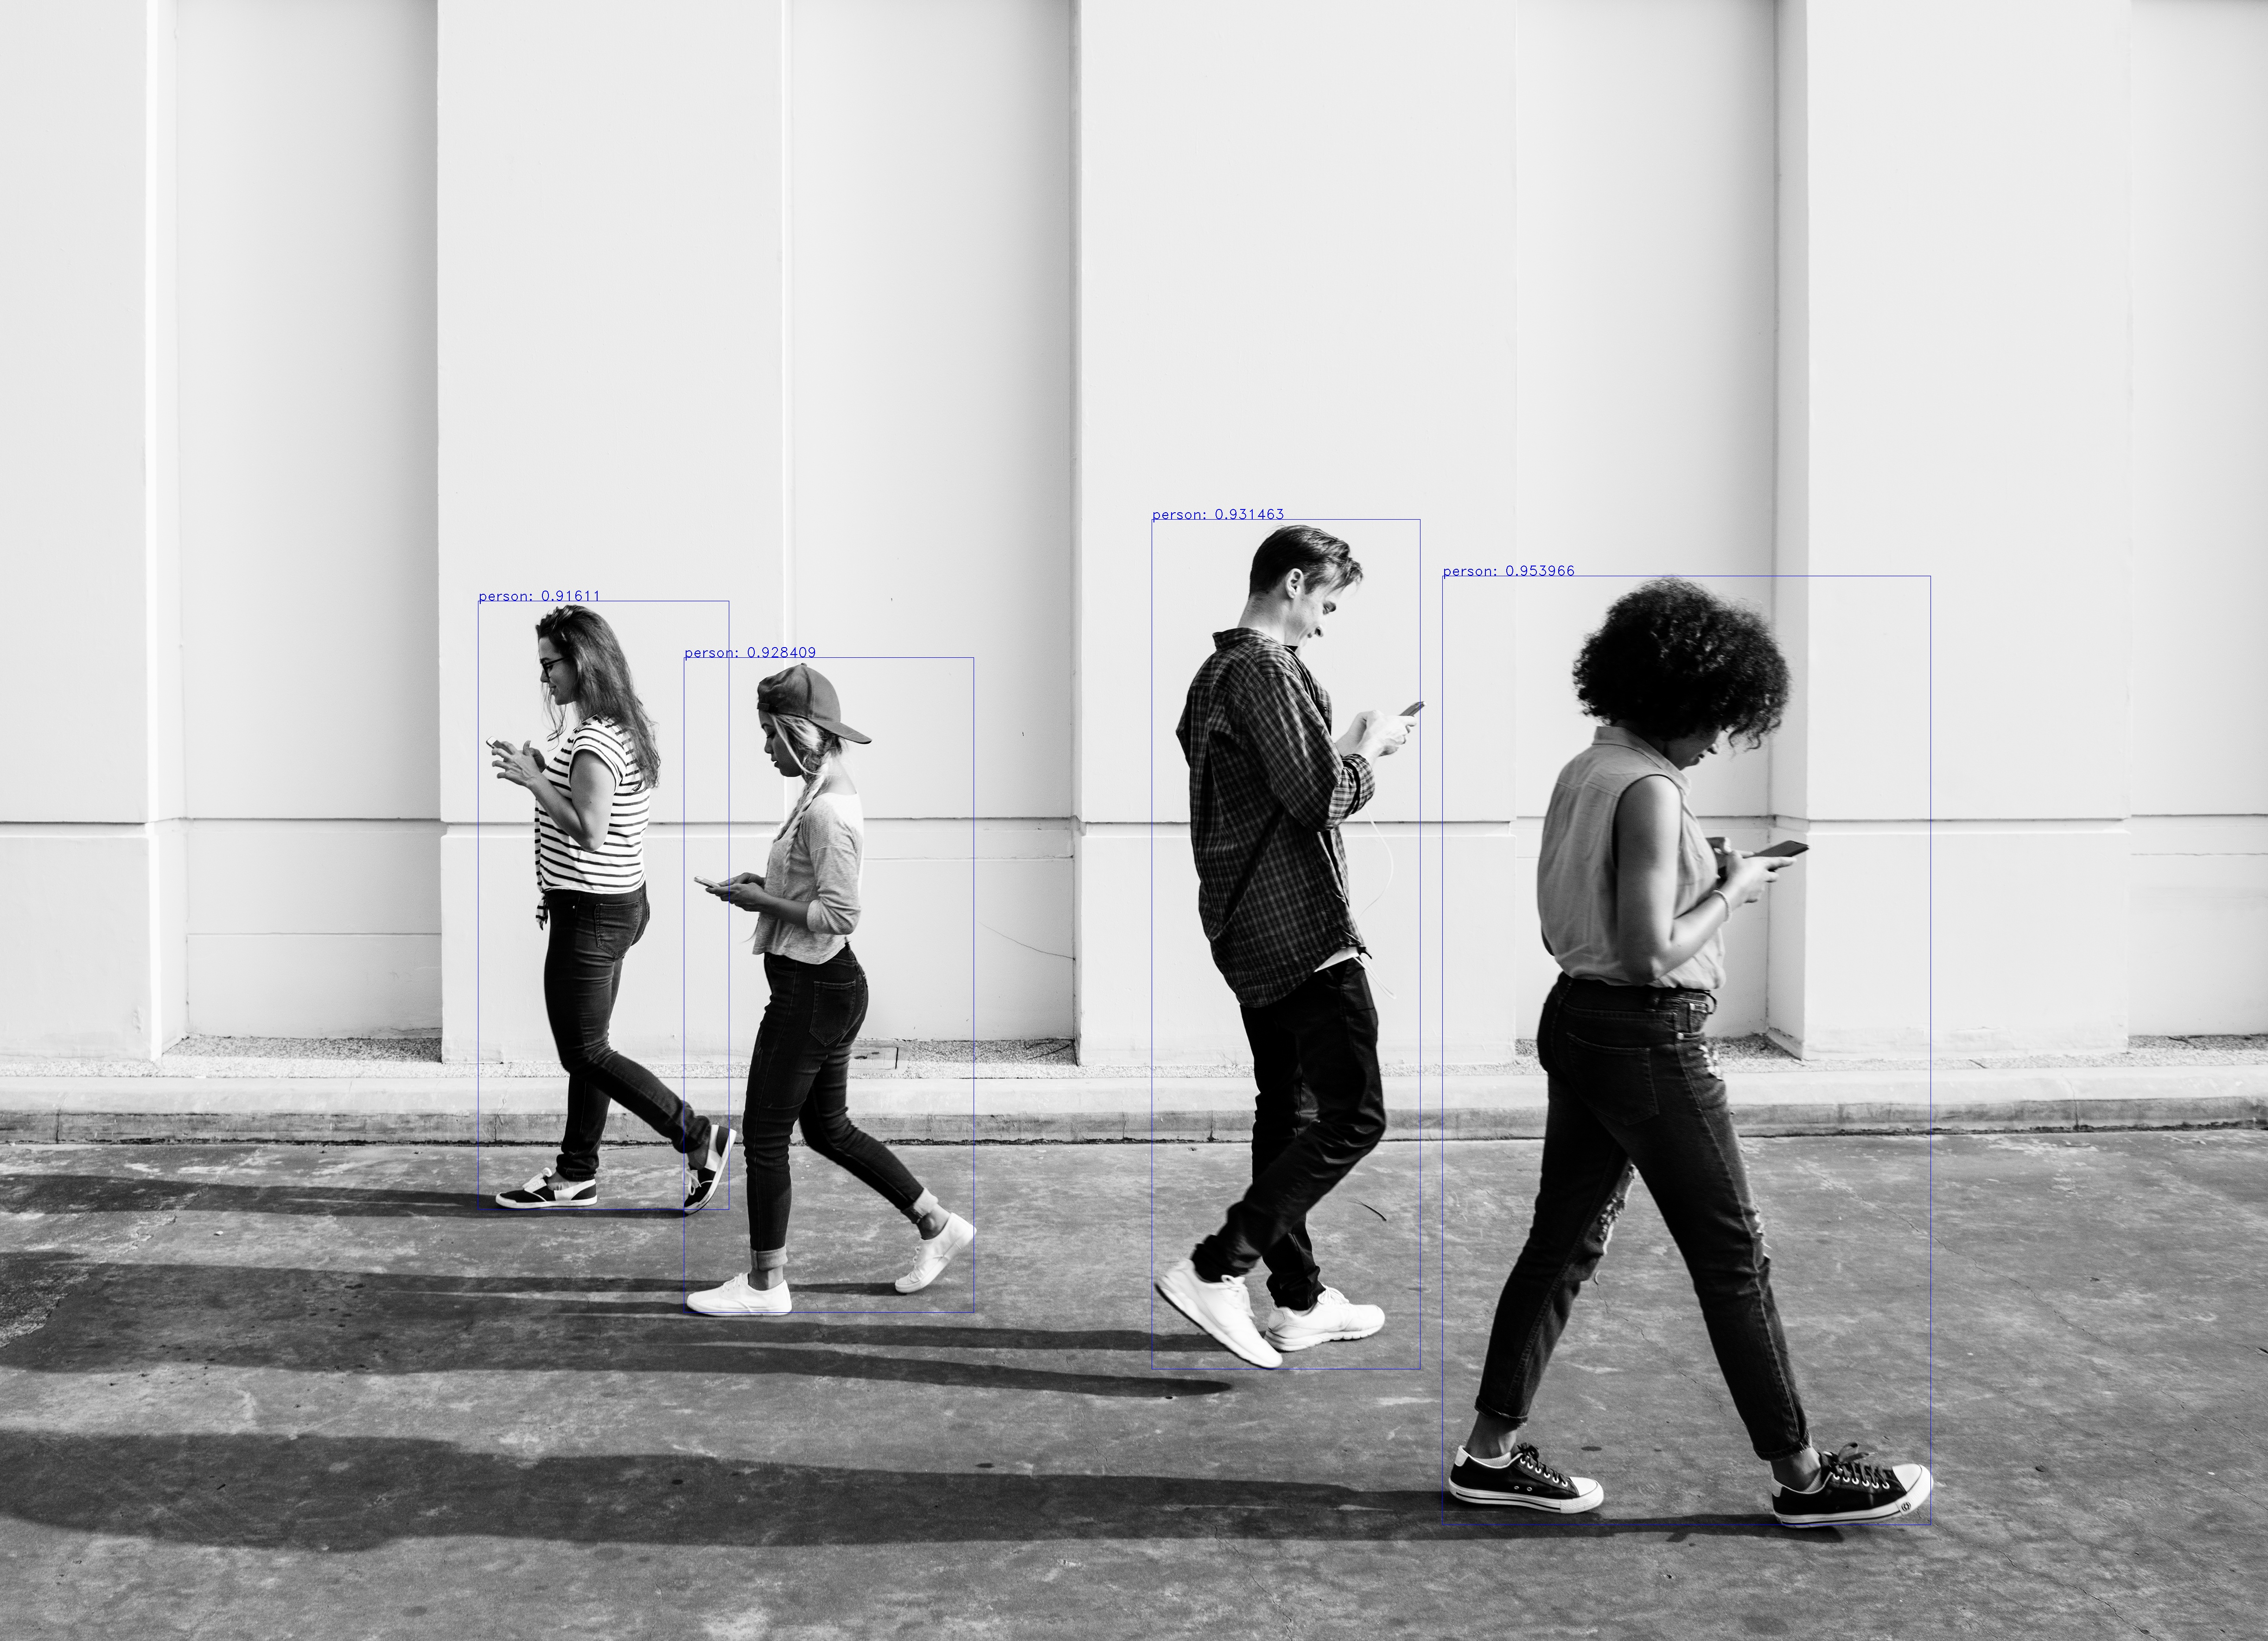
Example Output:
References